
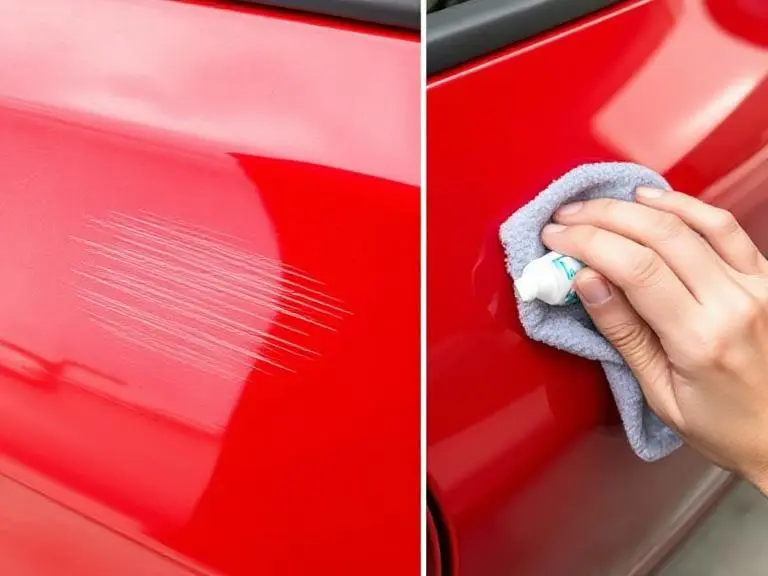
You walk outside, and there it is. Scratches! Your stomach drops. You start thinking about body shop quotes and how much this is going to cost.
Relax. You can probably fix this yourself.
The trick is figuring out how deep it is. Run your fingernail across the scratch. If it doesn’t catch, it’s just in the clearcoat. That’s the easy one. A little polish and it’s gone. If your nail catches, it’s deeper. You’ll need touch-up paint. If you see bare metal, stop. That’s a pro job.
In this guide, I’ll show you exactly what to use and how to do it. No fluff. No peanut butter. Just real fixes that work.
So grab a microfiber cloth and let’s get that scratch gone. Trust me, it’s easier than you think.
Table Of Contents
Table of Contents
First: Find Out How Deep the Scratch Is
Don’t buy anything yet.
Wash the damaged area with car shampoo and dry it with a clean microfiber towel. Dirt can make a shallow mark look much worse than it really is.
Now run your fingernail very lightly across the scratch.
Your nail doesn’t catch
Good.
The damage may be limited to the clear coat. This is the easiest type of scratch to deal with yourself.
A good polishing compound or scratch remover may remove it or make it extremely difficult to see.
Your nail catches slightly
Be careful here.
The scratch may extend deeper into the clear coat or even into the color coat.
You may still be able to improve its appearance, but don’t keep polishing indefinitely, trying to make it disappear completely.
You can see primer or bare metal
Stop.
Polishing isn’t going to replace missing paint.
This is where touch-up paint or professional body repair makes more sense.
And if bare metal is exposed, I’d deal with it rather than leaving it sitting there exposed to moisture.
What I’d Use for a Light Scratch
For a small clear-coat scratch, you don’t need an expensive detailing setup.
I’d start with:
- A good automotive scratch remover or polishing compound.

- A clean foam or microfiber applicator.

- Several clean microfiber towels.
- Car shampoo.
- Paint protection afterward.

That’s it.
You don’t need a machine polisher for one small scratch.
In fact, I’d rather see a beginner work slowly by hand than grab a machine and attack the paint without knowing how much material they’re removing.
For a Small, Light Scratch: Keep It Simple
If we’re talking about a small scratch that barely catches your attention in normal lighting, a dedicated scratch remover can be the easier starting point.
A product such as 3M Scratch Remover is aimed at this type of light paint correction.
This is the approach I’d take:
- Wash and dry the panel.
- Put a small amount of product on a clean applicator.
- Work a small section rather than the entire panel.
- Use controlled pressure.
- Wipe the residue away.
- Inspect the result in good light.
- Repeat only if you’re still getting noticeable improvement.
- Protect the finish afterward.
The last point matters.
Don’t keep polishing simply because you want a microscopic mark to disappear from every angle.
Good paint correction is controlled correction, not aggressive rubbing.
What About a Scratch Repair Kit?
This is where things get confusing because “scratch repair kit” can mean several different things.
Some kits are designed for light surface correction.
Others include touch-up paint for deeper scratches.
Those are completely different jobs.
If you’re looking at a kit that contains color-matched paint, first find your vehicle’s paint code.
Don’t assume that “Toyota Red” or “Honda Black” is enough for a perfect match. Factory paint can vary by model year, paint code, and even previous repairs.
For a deeper scratch, the goal is usually:
clean → prepare → restore the missing paint → allow it to cure → blend/finish appropriately.
That’s very different from simply polishing the surface.
Can Toothpaste Remove Car Scratches?
You’ve probably seen this trick all over the internet.
Here’s my honest answer:
I wouldn’t use toothpaste as my main scratch-removal method.
Toothpaste contains abrasives, so it’s understandable why the trick sometimes appears to work on extremely light marks.
But toothpaste wasn’t formulated as an automotive paint-correction product.
You don’t know exactly how it will behave on your particular clear coat, and it gives you much less predictable results than a product made specifically for automotive paint.
So if you’re asking me:
“Should I use toothpaste or buy a proper scratch remover?”
I’d buy the proper scratch remover.
It’s one of those situations where saving a few dollars isn’t necessarily saving you anything.
Do You Need a Machine Polisher?
For one scratch?
Probably not.
For a whole hood covered in swirls and light defects?
That’s a different story.
A dual-action polisher can make paint correction much faster and more consistent, but it doesn’t make the process impossible to get wrong.
You still need the right pad, compound, pressure, and working speed.
And you can still remove too much clear coat if you get carried away.
That’s why I’d tell a beginner to start by hand on a small defect.
Learn how the paint responds first.
Then consider a machine if you have a larger correction job.
The Biggest Mistake I See: Trying to Make a Deep Scratch Disappear With Polish
This is worth remembering:
Polish can correct the surface. It cannot replace missing paint.
If you can see primer underneath the scratch, polishing harder isn’t the answer.
If you can see bare metal, polishing even harder definitely isn’t the answer.
At that point, you’re treating the wrong problem.
For deeper damage, you need to restore the missing paint or have the panel professionally refinished.
When I’d Stop the DIY Repair
I’d call it a day and consider professional repair if:
- The scratch exposes primer.
- Bare metal is visible.
- There’s rust around the damaged area.
- The panel is dented.
- Paint is peeling around the damage.
- The scratch is long and deep.
- You’ve made several careful correction passes, and the defect isn’t improving.
There’s no prize for fixing everything yourself.
Sometimes the smartest DIY decision is knowing when not to keep going.
What I’d Buy for a Basic DIY Scratch Repair
If I were helping a friend put together a small kit, I wouldn’t tell them to buy ten different products.
I’d keep it simple:
For light scratches
A dedicated automotive scratch remover or polish, such as 3M Scratch Remover.
For more noticeable clear-coat defects
A stronger compound such as Meguiar’s Ultimate Compound.
For scratches that have lost paint
A quality touch-up system matched to the vehicle’s actual paint code.
For every job
Clean microfiber towels and suitable applicator pads.
That’s enough for most basic DIY situations.
You don’t need a garage full of detailing products.
A Simple Scratch-Repair Decision Guide
| What you see | What I’d do |
|---|---|
| Very light mark, no nail catch | Scratch remover/polish |
| Clear-coat scratch | Polish or compound |
| Nail catches | Inspect before doing more correction |
| Color coat damaged | Consider touch-up paint |
| Primer visible | Touch-up or professional repair |
| Bare metal visible | Repair the paint rather than polishing |
| Scratch plus dent | Professional body repair |
How Much Does It Cost?
This is where DIY can make a lot of sense.
A small clear-coat scratch may only require a relatively inexpensive bottle of compound or scratch remover and a few microfiber towels.
A deeper scratch can require touch-up paint and additional preparation.
A body shop will cost considerably more because you’re paying for labor, preparation, paint matching, and refinishing.
But don’t make the mistake of thinking the cheapest product is automatically the cheapest repair.
If a $15 product saves you from damaging a $1,000+ paint job, spending a little more on the correct product was the cheap option.
The Bottom Line
Before you buy anything, look at the scratch.
If you can’t feel it with your fingernail and there’s no exposed paint or metal, you’ve got a reasonable DIY project. Clean the area, start with a proper automotive scratch remover or compound, work slowly, and inspect your progress.
If the scratch has gone through the paint, don’t keep polishing.
You can’t polish missing paint back onto the panel.
That’s when touch-up paint or professional repair becomes the sensible solution.
And if you’re wondering whether toothpaste or WD-40 is the secret trick you’ve been missing, my advice is simple:
Skip the miracle hacks and use a product designed for automotive paint. You’ll get a more predictable result and have much less chance of turning a small scratch into a bigger repair.
Pingback: Discover the Best Way to Clean a Car (From a 17-Year Pro)